
 This past winter when we were completely snowed in, I wanted to sew really badly. I had some great fabric but I didn't have any good patterns to work with. So I searched Etsy and bought a few things. The first pattern to arrive in my inbox was this super cute dress by Carolina Fair Designs. I printed it out and taped together what I needed.
 I only had 1/2 yard of each of these Petite Ecole fabrics from Kokka so I sliced apart the pattern at the shoulder seam and added a seam allowance. I think it adds a nice dimension to the dress. But what makes this pattern great is that you don't actually have to do any construction. The basic shape of the dress is cut from one piece of fabric. All you have to do is apply the bias tape and you're done. It should be quick and painless (unless you're me and have to learn the hard way).
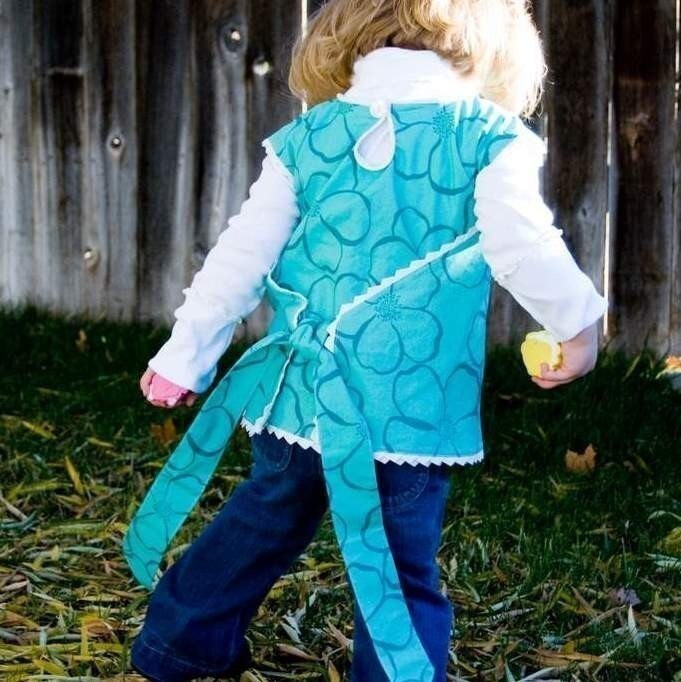
 As you can see, my finished product is a bit different than the original design. Remember my disastrous bias tape experiment? Well, I never did get it the way I wanted so I created a blend of a hem facing and a lining for the top of the dress using the dress I had made as the pattern (my bias tape situation had gone so awry that I had to cut out the cute little button detail). Had I not completely altered the neckline with my mistakes, I could have just used the original paper pattern.
 Normally you would do a facing for the bottom hem of a shirt or skirt that has too much curve to it (a roll hem will just bunch up unless you have mad skills). Basically you're stitching the main garment to an identical lining piece (right sides together), clipping the curves and turning it inside out. Topstitch when you're finished to give it that more polished and professional look (I like using a contrasting color when I do my topstitching because it adds some visual interest). I did all that before I added the bias tape edge to finish the dress. If this makes absolutely no sense and you want me to explain it further, let me know and I'll make another one of these cute dresses and do a tutorial for you now that I have it all figured out.
 Finally, I added this cute little pocket. I was going to buy a $7 wooden school bus button that Kokka also created as part of this line but thought that would be insane and added this adorable tape detail instead. It cost much less and I still have a lot of it to work with. I do have a good bit of the trim and the fabric left so I will be doing something else with it in the future.
SORRY. COMMENTS ARE CLOSED. WINNERS HAVE BEEN PICKED.
So now, on to the good stuff:
Caroline of Carolina Fair Designs and I have kept up our correspondence since my initial purchase of the pattern. I asked her if she wanted to giveaway one of these patterns on this blog and she said actually, she would give two! To enter, go to her website and take a look at the patterns. Leave a comment on this post stating which one you would like (we will not hold you to that decision, you can change your mind). Tomorrow, I'm going to post about the Pretty Pinafore pattern (in which I actually follow the rules). Enter again on tomorrow's post. I'll pick winners on Monday, August 16.
And make sure we can find you! Leave your email address or a link to a way to contact you. Thanks!


