Even if you already own some dollhouse furniture, it's always fun to make more. Most of the following tutorials require little more than a hot glue gun and some cardboard. Some take it to the next level with wood and tools. Choose your own adventure.
My friend Mel of
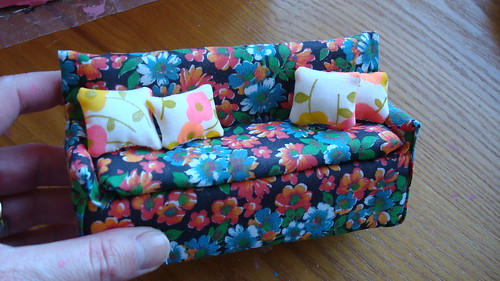
Sparklerama, has two tutorials. First, this really cool sofa. All of the instructions are clearly described in her
flickr. For this one, you start with a cardboard base, add some batting, cover with fabric, then upholster it. Looks easy. I can't wait to try it. She has several dollhouses for different types of dolls so take a peek at her photostream to get some inspiration.
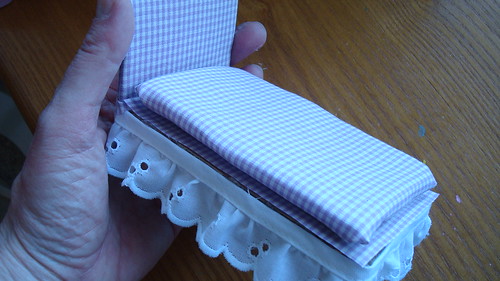
The second is for
this cool bed. It's pretty much the same idea but with fewer steps. Mel has an
Etsy shop where she sells miniatures that you should check out. I've got my eye on one of those rugs.
Catherine of
Hyggelig has been busy making some amazing furniture for her daughter. While there aren't any tutorials (and you'll have to translate the site from German), I love the aesthetic and it looks doable. This
dining table and bench are lovely. I like family seating like that. It reminds me of going to my Grandma's when I was little.
I also love this
sofa. She explains how she made it very clearly. Click
here and
here for some other wonderful pieces. And tomorrow we'll have an interview with Catherine so stay tuned.
This gorgeous
room is by Joel Henriques of
Made by Joel from last week's post. He's using some tools but the simplicity of it makes it much less of challenge. I want that chair in my real life. And I honestly had never really given any thought to foliage in the dollhouse. What a great idea to use a real stick. I'm definitely stealing that idea.
For a little bit of holiday cheer,
Ohdeedoh did a feature a couple of weeks ago on dollhouse Christmas trees that you can make.
Finally, I did some old fashioned searching on Google and weeded through the craziness to find this
link list on cdhm, Custom Dolls, Houses & Miniatures. While for some of them you need to have a woodshop and a few of Santa's elves, many are simple and use polymer clay. I love the tip on how to add the crumb texture to the cake. It's definitely worth browsing through the tutorials to get some ideas on what you can make yourself.


