After seeing this post over at Mon Ami, I had to buy this pattern and make the romper myself. I found Mon Ami Journal through the Elsie Marley Kids Clothes Week challenge and both are excellent blogs for inspiration.
Luckily, I found the pattern on Etsy right away. It was a size 3. Perfect!
The pattern was super easy to follow. I didn't have any issues with the instructions or the fabric. I chose Alexander Henry's Tillbrook Sprites for the body of the romper and some of the coordinating print for the straps. There is a LOT of pink in the pattern so I went with a solid green for the top and I love how it pulled out the hints of different greens from the foliage around the fairies.
I used teeny tiny buttons for the top closure. They have a hint of pearl to them that's a welcome shimmer against the bold green. The ones in this photo are green. The original buttons are red so they pop out more against the solid.
The 3t is a bit roomy but I'm hoping we'll get some use out of this next year. In fact, it seems like there is a trend toward vanity sizing in kids clothes and that really pisses me off. Kids clothing should correspond as closely as possible to the age. Two-year olds should be able to wear a size 2, three-year olds should be able to wear a size 3, etc. Of course there will be bigger kids and smaller kids but you get the idea. Zadie grew out of most 2t big box store clothing right about the time she turned 2. But when I sew vintage clothing patterns in a size 3 they are massive. Ok, end rant.
Anyway, to solve the problem of the romper being enormous, I just sewed a second button about an inch above the original. I took the photo above (with gnome) after putting the romper on her for the first time. In most of the shots, it is just hanging off of her (and her hair is wild). The new button makes it fit much better and when she grows, we'll just start using the lower button. This is the garment I used for the snap tape tutorial so you're finally able to see it in action. I don't know why it took me almost 3 weeks to sew a couple of buttons on.
Zadie is heading off to daycare this week (sniff). At home she sleeps with an entourage (and calls it such): blankie made by Auntie Steph, Mila, Elph, sometimes Rat, and The Soft. The Soft is this oddly shaped blanket that I made out of the fabric that was left over from this awesome cape. Our packing list for daycare includes any special sleeping blankets the child may have (and practically half the house). I would love to send The Soft along to daycare but it is just going to get left there, grossed up, and who knows what else.
So after a discussion, Zadie agreed that a Special Soft would do for daycare. She requested blue and luckily they had some in stock. It's not as slippery as the crazy stuff I bought last year so it was easy to stitch up. Since I had some left over, I made Mila and Rat their own special softs. The pictures show the shenanigans that ensue when the three get together. On top she is pretending to sleep. I'm not quite sure what is going on in the second photo but that is usually the time out spot. As you can see, everyone loves their new softs (and you can see the alphabet version of the pretty pinafore in action, well, sort of).
Our garden has been prolific in new ways this Summer. For years we've grown zucchini, yellow squash and pattypan without doing much. We've never been able to grow an acorn squash or any other type of Winter squash despite a great deal of effort. This year, however, the tables were turned. We have had some lovely spaghetti squash, some tiny acorn squash, and lots and lots and lots of butternut squash but the yellow squash and the zuc in the picture were the only two we got. Crazy! We've also got several million delicious cherry tomatoes (and I'm not complaining).
In other news of bounty, I got Zadie this AMAZING wool coat at a yard sale for a couple of bucks. I love the patterned velvet collar and shoulder thingies.
Check out the hat. Cute. The pics are not quite true to color. The coat is not navy but it's not bright blue either. It's really quite perfect.
I bought a 2t coat for her last winter and rolled up the sleeves. The smaller size would not zip up so I went up a size and I'm really hoping it will fit this year as coats are wildly expensive. As it's been nothing but 95 and humid around here, I will not torture her with a trying on session. This yard sale find is a 3t so my bases are covered (what's with all my quippy little cliches this post?).
A local church had a rummage sale in their basement last weekend and I spotted a box of patterns as soon as I walked in the door. I asked, "How much for the patterns?" The lady at the card table replied, "Oh, 5 cents each."
There were 20 patterns total. As you can see, most are a size 34, just a little too big. Several were a 36. Two of them were from the '80s and so ugly that I couldn't bear to photograph them.
I've put the ones close to my size in my pattern bin and the rest have been stored for later.
Lucky, lucky me. I'm not ready to deal with any of these yet but they are nice to have and dream about.
I have really been working hard on getting the office/studio in shape. On a whim and in a fit of impulse buying fury, I snatched up the last two Liberty of London bins from Target a few months ago and promptly filled them with important stuff. One holds my patterns (see disaster above) and the other (a different size and shape) is filled (well, actually overfilled) with clothes I plan to repurpose.
After not being able to find any of the patterns I was looking for, I tore the whole thing apart and took care of business. Here is the newly organized bin. I took out all of the photocopies and pages I printed from the internet and pdfs and they now live sleeved in brand new binders sorted by type. I bought two "natural" cardboard-like ones from Office Depot and two shiny brown ones with cool covers from Target. I'll hot glue some ribbon down the spine of the shiny ones because they are too shiny and, well, I found that ribbon I mentioned before and I think it will look so cool.
I'll show you the whole space as soon as it's finished. I picked up some more of that cardboard looking stuff in the form of photo file boxes from Michael's to replace my plastic lidded tubs. Mr. Lemon is now using the tubs and they are perfect for him. The best thing is that even after a trip to Ikea during which I found NOTHING that will work for the space we have, I stumbled upon a little gem at our local Lowe's that is precisely the dimensions I need to be both a coffee/side table and a storage solution. But it's out of stock so stay tuned. I did find it online but shipping, wow. Patience, grasshopper.
The only problem for me is that I have these fabric cubes that fit in the square spaces and the green ones are so ugly to me and I hate them. I bought them on clearance but I want to get rid of them and that is just not something I can do if I can't use them somewhere else in the house. So maybe I'll cover them up or something. We'll see.
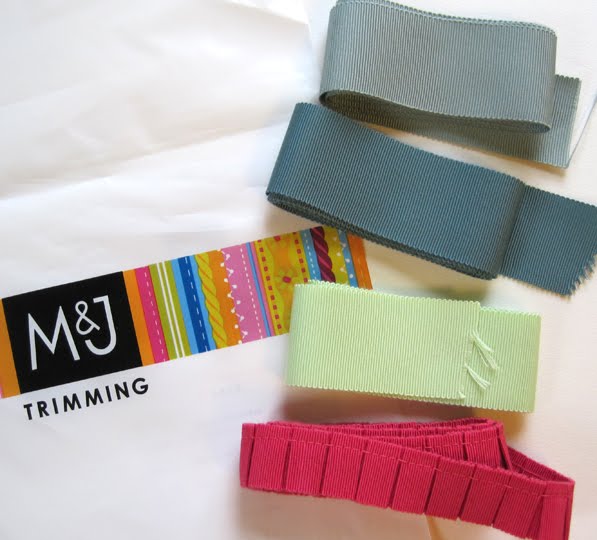
So this is the last of the haul from our trip to New York City: all from M & J Trimmings. I first heard of this awesome shop from a cute little book called The Curious Shopper's Guide to New York City that I bought for my mom before one of our visits. The book is full of lovely little tidbits and I'm hoping to steal it from my mom next time I'm home but the store itself is full of so many more lovely tidbits that I was a bit overwhelmed.
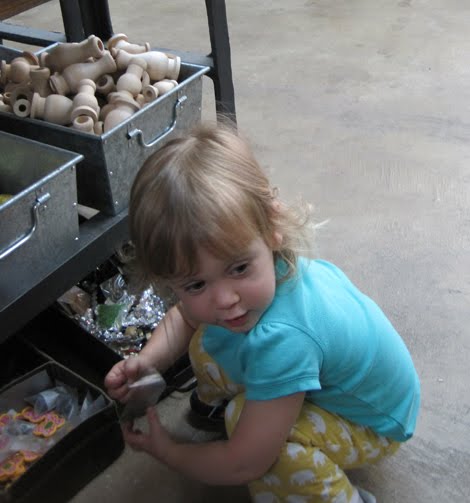
As you can see, the wild child loved it too. She loves helping me sew so she actually wasn't even that wild in there. She was super good and chose well.
I picked up some beautiful grosgrain ribbon for the dress (still can't decide but I think that one at the top is getting 86'ed) and that cool raspberry trim because I couldn't resist it. The salespeople were super nice and very helpful. They were also great with the kid being in the store. It was getting late and we were all hungry so I didn't get to check out the entire room of buttons but that was probably a good thing.
I finally got the perfect fabric (I hope!) for my vintage shirtwaist dress pattern. I thought I had written a post about buying the pattern but I guess I only put the photo up on the Project: Project Facebook page. I even neglected flickr, apparently.
I've been wanting to make a shirtwaist dress for a long time. I love how they are dressy but casual all at the same time and you can just do so much with them. I spent hours on Etsy finding the perfect pattern and was thrilled with it when it arrived.
I knew I would go to Beckenstein Men's fabrics in the Garment District. I stumbled upon the store a few years ago when searching for the perfect seamonster fabric for the yeti loves seamonster dolls that never surfaced (ha ha, elusive beasts). I knew I would find the most amazing men's shirt fabric in the perfect color. I mapped out the spot (along with the other places we checked out) and made it the first stop in the plan. And it was closed. (Homer slap to forehead, doh!). I read the hours but I didn't pay attention to Saturday. So anyway, lesson learned (I should change the name of this blog).
But at a shop close by, I was greeted by incredibly helpful salesmen (yes, they were all men) who put up with wild child (brought in by Mr. Lemon from Starbucks because I needed help deciding what color worked best on me in the tragically flourescent lighting). The shop had a great selection and the quality and color I was looking for. I'm really happy with it. The grosgrain ribbon from last post will be used as the belt. I'll post some pics of the colors together after I decide which way to go. I am not sure you can really get the fabric from this photo. It's kinda coral and kinda pink and surprisingly like the dress on the pattern cover which was not my intention at all. I had wanted to go blue but threw that out at the last minute. The warp and the weft are two different colors which adds some dimension and enhances the texture.It's very good quality and probably cost less than I would have spent elsewhere. I have to say I will check this store out again. Happy accident.
During my lunch hour at work, I read blogs and follow links and just get lost in it all sometimes. Back in April I read this post over at the Colette blog about Tinsel Trading and I just had to go there. Unfortunately, I don't have any good photos of the shop but Mr. Lemon kept the wild child occupied while I shopped around. She had a blast looking at all the bins full of bits. We bought her a sparkly letter Z for the alphabet in her room. I could have spent a million dollars.
Luckily, I didn't. But I did pick up some gorgeous ribbon. The striped grosgrain is to go with what I'll show you tomorrow. The yellow velvet on the far left is to spruce up some binders in my office. The wide brown velvet was just too gorgeous to pass up, the yellow striped velvety ribbon was really cheap, and who can see super wide orange ric rack and not buy it? Panda is in the shot because my little helper thought it was important. But can you see my yellow theme? How weird, huh? I've never really been into that color much before but I picked up a good bit of it on the trip.
Overall, I just loved this shop and will try to pop in every time I'm in Manhattan.
For the first post on the Wraparound Dress, comment #19: Nicole from Louisiana.
For the second post on the Pretty Pinafore, comment #1: Carrie, the Non-practicing Librarian
Congrats!
If I can find your email, I will send it on to Caroline so that she can send you the pattern of your choice. We decided not to hold you to your original decision. You can change your mind and choose either one.
I used the Random Number Generator found here but how weird is it that for the first post it picked the last comment and for the second post it picked the first? I'm not sure it could get more random than that.
We took a weekend trip to New York recently to gather some supplies. Every time we hit the city, I make a point to stop into Purl. It was my first time in the new location and I thought it was great. Very roomy. They had a really nice selection of embroidery flosses, what seemed like the same amount of fabric, and a nice spot to look at patterns. Of course, there was the usual gorgeous crafty inspiration hanging out on every shelf and every corner.
The first thing to catch my eye were these little wool felt dolls by Mimi Kirchner. I didn't take any notes or photos of them while I was at the store but I couldn't stop thinking about them. When I got home, I did some snooping and found this awesome free pattern. I'm going to try to make one. I've had an idea brewing for a long time and I think this is what I needed to make it work.
I started my collection of Heather Ross' Far Far Away II with these lovelies. My color palette has been leaning toward this yellow and I bought several different versions of it on the trip (more on that later this week). The only embroidery floss available here is DMC and its generic counterparts so I decided to try some Trebizond silk (teal) and Londonderry spun linen (jonquil). They are both really lovely.
Of course, some Alexander Henry. I'd seen the larger print before but never the smaller one. I think they'll look lovely together and I have a pattern in mind. The polka dot trim caught my eye and I think it will look good with some fabric I picked up at Ikea. You never know...
Finally, I bought a teeny tiny bit of this Liberty of London gorgeousness to match the storage boxes from Target. I'm going to recover some pillows we have on the pullout in the office and I thought it would be nice to throw in a bit of this as an accent. It's not the same pattern but I didn't want to be too matchy matchy.
Patterns for kids clothes often call for snap tape. This is twill tape with pre-set snaps all ready for you to sew into your garment to make potty training and diaper changes easier. It seems to me that while this tape is handy, it's often hard to find. The tape I've found is also wider than I'd like and the snaps are set too far apart. I decided to make my own to get exactly what I want. Here's what to do if you want to do as little hand sewing as possible.
Materials: 1/2" twill tape. Size 15 or 3/8" snaps*. Garment in progress. *Note if you want to use larger snaps, you will need wider tape.
As you can see in the image above, the FRONT of the garment will provide the top of the two flaps so that the opening will face toward the back. This is where I placed the open (female) side of the snaps.
1. Hem the bottom of the legs, leaving the crotch seam open (see sides of picture below).
2. Turn the BACK crotch seam under twice to completely finish the edge just like you did with the hem of the legs. Turn the FRONT seam under once about 1/4" to clean up the edge (not pictured). Stitch.
3. Cut 2 pieces of 1/2" twill tape to the width of the crotch seam, adding about 1/4" to allow for turning under at both sides.
4. Turn the ends of one piece of the twill tape under and pin. Stitch to the right side of the BACK.
5. Turn the ends of the second piece of twill tape under and pin. Stitch the twill tape over the unfinished edge of the FRONT crotch hem on the wrong side of the fabric.
6. Mark on the tape where you want to place your snaps so they will match up when closed. Set your snaps following the package directions. The prong (male) side goes on the BACK. The socket (female) side will go on the FRONT.
7. Handstitch the wide opening closed on both pieces of tape.
This is what the open (female) side will look like.
And you're finished!
I hope this will be helpful. It took me a couple of tries to figure out the best way to do this with the least amount of handstitching possible. Please let me know if you have any questions and I'll do my best to answer them.
Here's the little scrap of fabric from the doll I wrote about in yesterday's post. Each little flower head is about 1/16" so super tiny. It appears to be 100% cotton. I would love to know more about it. The fabric reminds me of some feedsacks my grandma had saved from when she was a little girl. It's gorgeous.
And this little mess is part of my design process for making the little Lego sack. I thought someone might find all my math interesting. On the left is a list of the fabrics I used with checkmarks next to them. I wanted to have a good amount of the fabric showing all around. There are also lots of little things crossed out from my bad math and from changing my mind. The bag is also mostly lined. I know I didn't write that yesterday. Because of the way I stitched the window and the zipper in there, however, I had to leave two seams (I think) exposed on the inside. If I made another one of these, I would eliminate that. I will have to think about the construction a lot more and not stay up past midnight.
And I didn't forget about the snap tape tutorial. It is complete but I wanted to show you the romper I made using the technique first. Alas, the terrible twos have hit us hard and I only have the one model (and the job that keeps me at work most weekdays). If I have time, I'll do the tutorial before the romper and show you the romper next week.
I got this beautiful doll for $4 recently. It's not something I look for at yard sales but it caught my eye and I couldn't stop thinking about it; it's just so beautiful to me. It came with a dress that I do not think was made for the doll but was either a baby dress or something for a larger child's doll. It all smelled pretty musty so I soaked the whole thing in a bucket of Bac-out then hung it out on the line to dry. The dress dried right away but the doll was still sopping wet after several hours. I decided to just rip her apart and pull out all the stuffing.
It appears that the doll was full of cotton balls. It was packed pretty tightly. I don't know what they used to stuff dolls with but this was stuffed long before the invention of polyester fiberfill, that's for sure. The only clue is a tiny scrap of floral print fabric that I left in my scanner at work (where I was so busy that I did not even have time to write this on my lunch).
Her face is in pretty nice condition and the arms and legs are complete except for a small chip off the left thumb. I'm going to re-stuff her and set her on my shelf as is. I love the patina on the cotton fabric and the hairline fracture at her neck. It should be pretty easy to put her back together but I have never attempted something like this before. I'll post a scan tomorrow of the little piece of fabric. I'm thinking 1940s.
Before our vacation, I spent a lot of time gathering books and toys to take with us. I searched for anything portable and with enough substance to keep the 2-year old occupied for "long" stretches of time. She loves legos (it's in the genes on both sides) and seemed ready for the upgrade to the smaller size so I bought the big set of pink Legos from Amazon. Of course we couldn't bring the massive tub with us on the plane so I decided to make a bag for them.
I had seen this amazing drawstring toy sack tutorial on Make it Perfect through Craft Gossip. At the time, I just thought it was very clever. I had no plans to actually make it. But then I bought some Yo Gabba Gabba panties and they came in this nice little pouch. Of course, I threw it away and had to dig it out of the trash when the thought came to me to make a little window out of the vinyl just like in the tutorial.
I wanted something more case-like so I didn't even follow the tutorial at all beyond the inspiration (although that might not have been a bad idea because she uses paperclips to hold the fabric to the vinyl since you can't pin through it. I just fought with it instead). I used Lizzy House's Red Letter Day again with the Pearl Bracelet print and more ducks. The tree stump fabric is by Jay McCarroll, my favorite winner of Project Runway, and grosgrain ribbon for the handles.
This, surprisingly, was not too difficult to make. I had to do a drawing of what I had in my head. Then I added some measurements to that. Then I kind of exploded the drawing and added seam allowances to my edges to figure out what to cut. The bottom has a layer of stabilizer/interfacing in it and I wish I would have used it on all sides because now that the case has seen some use, it's not as stiff as I would like. I expect our Lego collection to outgrow this soon but I'm impressed with it. Even though it is not perfect, I was proud to pull it off.
Here is my second go at the Pretty Pinafore by Carolina Fair Designs. I used the more boyish color of the alphabet fabric by Cosmo Cricket and let Zadie pick out the bias tape. We almost went with a bright raspberry to girl it up a bit but decided a dress was girly enough. You can read my review of the pattern and see more images here.
Carolina Fair Designs is giving away two patterns on this blog. You have two chances to enter. Go to her shop, pick out which design is your favorite, then leave a comment on each post (Wraparound dress here and Pretty Pinafore here). Make sure you leave some contact info or a way to find you.
Winners will be chosen August 16. Good luck and happy sewing. Yay!
THANKS TO ALL WHO COMMENTED! THE GIVEAWAY IS CLOSED.
When I saw on the Carolina Fair Designs blog that she needed testers for a pattern, I jumped on the chance. Although I review patterns all the time, I had never been the first to try something. Plus, I liked working with the Wraparound Dress so much that I thought it would be a win-win. The Pretty Pinafore is another one-piece pattern that is super easy to make. The only bit of construction is to sew the shoulder seams together.
I used this amazing alligator (or is it crocodile?) fabric designed by Anda of boosterseat. She is in the process of moving right now so you can buy her fabric directly from Spoonflower or just wait. It will be worth it. She is an amazing person and so talented you won't believe it.
The little gator there on the pocket is a cross-stitch design from Andwabisabi. She has a ton of great patterns and they are very well priced. I wrote about stitching this before. I made quite a mess of it but my 2-year old doesn't mind and you can still tell it's a gator so that's all that really matters, right? I made the pocket from a bizarre collar that I bought at a thrift store. The packaging was hilarious. It has a crocheted lace edge to it that has now pulled out of my bias tape edging. I'll have to fix that but I'm not sure how.
The overall dress is so simple. After you stitch the shoulder seams together, you just apply your bias tape to the whole thing in one continuous loop. I do recommend that you stitch one edge of the tape down (right sides together) then fold it over and stitch it closed. I tried a quick and dirty one step method and the dress pulled out of the tape in several areas. I have been re-stitching them and it has taken far longer to fix my mistakes than it would have been just to sew it right the first time. But that seems to be how I do things...
As you can see it's a great fit. I like that it has a pinafore look but it's a dress. You can make a tunic or shirt version with this just like you can with the Wraparound Dress. Both hems are noted. A nice touch.
And check out this amazing little stop-animation video that Caroline made to demonstrate sewing the dress. It is really awesome. And only 1 minute long.
SORRY. COMMENTS ARE CLOSED. WINNERS ALREADY CHOSEN.
Don't forget that Caroline is giving away two patterns. To enter, go to her website, pick out which of the two patterns you would like and leave a comment on this post. For a second entry, go to yesterday's post and leave a comment there as well. Make sure you leave your email address or a way to find you! Winners will be chosen August 16.

 After seeing this post over at Mon Ami, I had to buy this pattern and make the romper myself. I found Mon Ami Journal through the Elsie Marley Kids Clothes Week challenge and both are excellent blogs for inspiration.
 Luckily, I found the pattern on Etsy right away. It was a size 3. Perfect!
 The pattern was super easy to follow. I didn't have any issues with the instructions or the fabric. I chose Alexander Henry's Tillbrook Sprites for the body of the romper and some of the coordinating print for the straps. There is a LOT of pink in the pattern so I went with a solid green for the top and I love how it pulled out the hints of different greens from the foliage around the fairies.
 I used teeny tiny buttons for the top closure. They have a hint of pearl to them that's a welcome shimmer against the bold green. The ones in this photo are green. The original buttons are red so they pop out more against the solid.
 The 3t is a bit roomy but I'm hoping we'll get some use out of this next year. In fact, it seems like there is a trend toward vanity sizing in kids clothes and that really pisses me off. Kids clothing should correspond as closely as possible to the age. Two-year olds should be able to wear a size 2, three-year olds should be able to wear a size 3, etc. Of course there will be bigger kids and smaller kids but you get the idea. Zadie grew out of most 2t big box store clothing right about the time she turned 2. But when I sew vintage clothing patterns in a size 3 they are massive. Ok, end rant.
 Anyway, to solve the problem of the romper being enormous, I just sewed a second button about an inch above the original. I took the photo above (with gnome) after putting the romper on her for the first time. In most of the shots, it is just hanging off of her (and her hair is wild). The new button makes it fit much better and when she grows, we'll just start using the lower button. This is the garment I used for the snap tape tutorial so you're finally able to see it in action. I don't know why it took me almost 3 weeks to sew a couple of buttons on.


