Today's awesome guest post is courtesy of Jess from Craftiness is Not Optional. She has done some amazing tutorials on her blog so I was so excited that she agreed to design something new for Play Eats.
These fabric pretzels look super cool but look how easy she makes it. They are a really great idea. My kid is starting to get into junk food (we've been lucky enough to hide it from her for a long time) so these are on the radar.
Click over for the full tutorial.
Thanks so much to Jess for baking up this batch. Make sure you check out her other play food tutorials here and these awesome upcycled kitchen canisters. She is super talented.
All photos courtesy of Jess.
Showing posts with label free. Show all posts
Tuesday, March 15, 2011
Wednesday, March 09, 2011
Play Eats: Make more play foods
Not all handmade food has to be super involved or time consuming. This ravioli just requires pinking shears and an iron.
First, iron your Wonder Under to the dough colored felt. Cover the whole project with a cotton dishtowel or you'll melt the felt and ruin your iron.
Next, cut your felt into strips and then squares. I found it easier to make these one at a time. Peel off the paper backing to your interfacing and place a triple size cotton ball right in the middle of the square. Put another square on top (interfacing together) and iron each side. Don't forget your dishtowel! Don't worry about being neat because you'll trim your edges.
Snip snip with the pinking shears and you have some easy no-sew ravioli. If you didn't do a good job with your ironing, you can always pull apart where it didn't fuse, dab some glue stick on it, and iron it back up. To make the cute jar, I just hot glued some vintage ribbon to a Christmas container from the Dollar Store.
These peas and carrots are even easier. Buy some tiny pom poms and you have peas. The orange carrots are made from polymer clay rolled into a cylinder and sliced and baked.
Tomato slices take a bit more time. Embroider some veins onto your solid and stitch to your backing fabric RST (right sides together) leaving a gap for turning. Stuff with a smidge of polyfill. Turn them inside out and handstitch up the little gap.
There are several different tutorials out there on this bowtie pasta. But it does take a long time to stitch each one together. They look really cool though so the effort is worth it.
We eat lots of wrap around here. This is just some thick cotton fabric from the clearance bin at JoAnn's. I took some Tupperware from the cabinet and traced around it. Sew them together RST just like the tomato and clip the edges because you want nice round wraps. Stitch up your opening. Since these are flat, I just used the machine to finish them off.
And for the final step, I put all those painting skills that I got with that BFA to make char marks with the edge of a flat brush. I actually put a real tortilla on the table and copied it for the highest realism.
Let me know if you make any of these fun foods. Put some pics in the flickr pool.
First, iron your Wonder Under to the dough colored felt. Cover the whole project with a cotton dishtowel or you'll melt the felt and ruin your iron.
Next, cut your felt into strips and then squares. I found it easier to make these one at a time. Peel off the paper backing to your interfacing and place a triple size cotton ball right in the middle of the square. Put another square on top (interfacing together) and iron each side. Don't forget your dishtowel! Don't worry about being neat because you'll trim your edges.
Snip snip with the pinking shears and you have some easy no-sew ravioli. If you didn't do a good job with your ironing, you can always pull apart where it didn't fuse, dab some glue stick on it, and iron it back up. To make the cute jar, I just hot glued some vintage ribbon to a Christmas container from the Dollar Store.
These peas and carrots are even easier. Buy some tiny pom poms and you have peas. The orange carrots are made from polymer clay rolled into a cylinder and sliced and baked.
Tomato slices take a bit more time. Embroider some veins onto your solid and stitch to your backing fabric RST (right sides together) leaving a gap for turning. Stuff with a smidge of polyfill. Turn them inside out and handstitch up the little gap.
There are several different tutorials out there on this bowtie pasta. But it does take a long time to stitch each one together. They look really cool though so the effort is worth it.
We eat lots of wrap around here. This is just some thick cotton fabric from the clearance bin at JoAnn's. I took some Tupperware from the cabinet and traced around it. Sew them together RST just like the tomato and clip the edges because you want nice round wraps. Stitch up your opening. Since these are flat, I just used the machine to finish them off.
And for the final step, I put all those painting skills that I got with that BFA to make char marks with the edge of a flat brush. I actually put a real tortilla on the table and copied it for the highest realism.
Let me know if you make any of these fun foods. Put some pics in the flickr pool.
Friday, March 04, 2011
Play Eats!
Two whole weeks of awesome play food tutorials, play food reviews ('cause not everyone's crafty and some people are busy), play kitchen stuff, play dishes ideas, some great stuff. So stay tuned.
Special guest posts: Thanks to Sabra of Sew a Straight Line, Jess of Craftiness is Not Optional, and Katie of Hippos and Dinosaurs for their play food and cookware tutorials. Also thanks for extra reviews to Carolyn who finds amazing vintage furniture for cheap like it's her job. See their posts for links.
Day 1: Shopping Cart Tutorial
Day 2: Cherries, strawberries, tea, and peanut butter and jelly slices.
Day 3: Tortillas, peas and carrots, tomatoes, bowtie pasta, no-sew ravioli.
Day 4: Ideas on repurposing and thrift store finds.
Day 5: Play Kitchen roundup and inspiration photos.
Day 6: Pottery Barn Kids play kitchen review
Day 7: Fabric pots and pans tutorial
Day 8: Fabric pretzel tutorial
Day 9: Felt egg tutorial
Day 10+: Play Food Reviews...
Play food reviews disclaimer: I have either bought all of the play foods discussed here or a family member has bought them for my kid. No company is paying me to write about this stuff. But if they were, I'd still be super honest about it.
Also, the photos may or may not contain all of the pieces found in a particular set. The play kitchen is a mess and I did my best to find a nice sampling the day I shot the images.
Special guest posts: Thanks to Sabra of Sew a Straight Line, Jess of Craftiness is Not Optional, and Katie of Hippos and Dinosaurs for their play food and cookware tutorials. Also thanks for extra reviews to Carolyn who finds amazing vintage furniture for cheap like it's her job. See their posts for links.
Day 1: Shopping Cart Tutorial
Day 2: Cherries, strawberries, tea, and peanut butter and jelly slices.
Day 3: Tortillas, peas and carrots, tomatoes, bowtie pasta, no-sew ravioli.
Day 4: Ideas on repurposing and thrift store finds.
Day 5: Play Kitchen roundup and inspiration photos.
Day 6: Pottery Barn Kids play kitchen review
Day 7: Fabric pots and pans tutorial
Day 8: Fabric pretzel tutorial
Day 9: Felt egg tutorial
Day 10+: Play Food Reviews...
Finally, some Etsy tips.
Play food reviews disclaimer: I have either bought all of the play foods discussed here or a family member has bought them for my kid. No company is paying me to write about this stuff. But if they were, I'd still be super honest about it.
Also, the photos may or may not contain all of the pieces found in a particular set. The play kitchen is a mess and I did my best to find a nice sampling the day I shot the images.
Tuesday, February 08, 2011
Giveaway Reminder and the End of Book Reviews (for now)
That's all the books I have to review for now. I'll do another series again when I gather enough together. It seems like a good time of year so maybe next January.
Don't forget about the CSN stores gift card giveaway. No, they don't seem to sell books but they do have millions of other things and were very generous to provide such loot to a reader. $55!
You have to leave a comment on this post to enter. I'll pick a winner on Monday.
Over the next couple of days I'm going to write about some vegan things I love in penance for mentioning leather. I don't eat meat or use animal products but I also don't want to be preachy or judgmental about it so I don't usually talk about it at all. I plan to write a couple of posts on some things I have that are awesome so you can check them out too.
Don't forget about the CSN stores gift card giveaway. No, they don't seem to sell books but they do have millions of other things and were very generous to provide such loot to a reader. $55!
You have to leave a comment on this post to enter. I'll pick a winner on Monday.
Over the next couple of days I'm going to write about some vegan things I love in penance for mentioning leather. I don't eat meat or use animal products but I also don't want to be preachy or judgmental about it so I don't usually talk about it at all. I plan to write a couple of posts on some things I have that are awesome so you can check them out too.
Wednesday, December 29, 2010
Extending the tree skirt pattern
I took a photo of my tree skirt pattern for different sizes of trees. Christmas fabric is dirt cheap right now so you may want to make a pattern that will fit your tree and head out and pick some up to hoard away for your 2011 projects. The pattern I linked to in the previous post was made from the brown craft paper pattern that I placed on top of the extended version for the photo.
My mom has a very tall tree with a large branch span at the bottom. The bigger pattern is for her. It's about 2.5 feet from the center to the edge. As you can see, the hole at the center is much larger than the one for my little tree.
I recycled used wrapping paper to make the larger pattern. I wrote instructions on it for my SIL who plans to make one for her tree next year. So if you have a big tree, haul some of your wrapping paper out of the recycle bin and flatten it out. Tape my little pattern down and extend the straight lines with a ruler. Use that same ruler to mark your bottom curve.
My mom has a very tall tree with a large branch span at the bottom. The bigger pattern is for her. It's about 2.5 feet from the center to the edge. As you can see, the hole at the center is much larger than the one for my little tree.
I recycled used wrapping paper to make the larger pattern. I wrote instructions on it for my SIL who plans to make one for her tree next year. So if you have a big tree, haul some of your wrapping paper out of the recycle bin and flatten it out. Tape my little pattern down and extend the straight lines with a ruler. Use that same ruler to mark your bottom curve.
Tuesday, November 30, 2010
Thank you, Craft Gossip!
Anne over at Craft Gossip always makes me feel super awesome when she posts about my stuff. This tree skirt really is easy to make. I'm going to make a miniature one as soon as I make a miniature tree for my, I mean Zadie's dollhouse. I'll upload a pattern when I do so you don't have to resize the first one.
Sunday, November 28, 2010
Reversible Christmas Tree Skirt Pattern and Tutorial
Last year I designed this easy Christmas Tree skirt. I put together a tutorial but by the time everything was finished, it was too late so I decided to save it for now.
First you'll have to print out the pattern pieces, cut them out and tape them together along the line that's marked. Here is the bottom and here is the top. Print them out in landscape mode with no scaling. They should each easily fit on the page no matter what your printer margins are.
What you'll need:
4 fat quarters (or large scraps for the top). A quarter-yard cut will not be wide enough.
2/3 yard of something weighty like corduroy or a home decor fabric for the back (more if you're dealing with a directional pattern, less if the fabric is wider than 44")
1 pack of ric rack (more if you're making a larger skirt -- my Mom has 2 foot skirt radius and we needed just over 3 packs to make it all the way around)
thread and all that
This will fit with a four-foot tree (as shown above). If you want to make it bigger, add some paper below the rounded edge of the pattern and extend that curved line as long as you want it. Use a ruler to extend the straight lines. You will need to remove some of the top to compensate for a larger trunk.
This pattern piece will work for both the top of the skirt and the back. I used 8 sections for the top as shown. The back only has 4 sections to save some time piecing. So to make the same skirt, you'll need to cut 2 pieces each of 4 different fabrics for the top. Then for the back, fold the seam allowance under on one side (or just cut if off), and use that pattern to cut 4 pieces on the fabric's fold.
Lay out your top fabrics and stitch them together at the side seams RST (right sides together). You'll have seven seams. Do the same with your back fabrics. You'll have 3 seams. Iron your seams open (this will save bulk later).
Now, place the front on top of the back RST. Stitch the big rounded edge and the top edge and one side. You may want to leave a little section of the side open to tuck your ric rack into later. (I did not do this, I just popped the seam open with my seam ripper when I got to that point).
Clip those rounded seams. I like to make my clips about 2 inches apart. Every third clip I make v shape. This allows for easier turning.
Next, the fun part! Reach all the way inside the skirt and turn the whole thing inside-out. Beautiful! Press, press, press!
Tuck your seam allowance in on the open edge and pin that up. Then place your ric rack where you want it. Mine is about 2" from the bottom seam.
Pin about 1" of the tail of the trim into your pinned edge and stitch that seam closed. Finish placing the ric rack along the perimeter of the skirt and topstitch it into place.
When you get to the other straight edge, tuck the other tail of the trim into the opening you left and close everything up.
The last step is to topstitch your top. This will help it to lie flat.
I am happy to add more photos if anything seems confusing. Please let me know if you have any questions or problems with the pattern.
EDIT: There seemed to be some problems with the jpeg form of the pattern not printing the two pieces at the same size. I have uploaded pdfs and they seem fine.
First you'll have to print out the pattern pieces, cut them out and tape them together along the line that's marked. Here is the bottom and here is the top. Print them out in landscape mode with no scaling. They should each easily fit on the page no matter what your printer margins are.
What you'll need:
4 fat quarters (or large scraps for the top). A quarter-yard cut will not be wide enough.
2/3 yard of something weighty like corduroy or a home decor fabric for the back (more if you're dealing with a directional pattern, less if the fabric is wider than 44")
1 pack of ric rack (more if you're making a larger skirt -- my Mom has 2 foot skirt radius and we needed just over 3 packs to make it all the way around)
thread and all that
This will fit with a four-foot tree (as shown above). If you want to make it bigger, add some paper below the rounded edge of the pattern and extend that curved line as long as you want it. Use a ruler to extend the straight lines. You will need to remove some of the top to compensate for a larger trunk.
This pattern piece will work for both the top of the skirt and the back. I used 8 sections for the top as shown. The back only has 4 sections to save some time piecing. So to make the same skirt, you'll need to cut 2 pieces each of 4 different fabrics for the top. Then for the back, fold the seam allowance under on one side (or just cut if off), and use that pattern to cut 4 pieces on the fabric's fold.
Lay out your top fabrics and stitch them together at the side seams RST (right sides together). You'll have seven seams. Do the same with your back fabrics. You'll have 3 seams. Iron your seams open (this will save bulk later).
Now, place the front on top of the back RST. Stitch the big rounded edge and the top edge and one side. You may want to leave a little section of the side open to tuck your ric rack into later. (I did not do this, I just popped the seam open with my seam ripper when I got to that point).
Clip those rounded seams. I like to make my clips about 2 inches apart. Every third clip I make v shape. This allows for easier turning.
Next, the fun part! Reach all the way inside the skirt and turn the whole thing inside-out. Beautiful! Press, press, press!
Tuck your seam allowance in on the open edge and pin that up. Then place your ric rack where you want it. Mine is about 2" from the bottom seam.
Pin about 1" of the tail of the trim into your pinned edge and stitch that seam closed. Finish placing the ric rack along the perimeter of the skirt and topstitch it into place.
When you get to the other straight edge, tuck the other tail of the trim into the opening you left and close everything up.
The last step is to topstitch your top. This will help it to lie flat.
I am happy to add more photos if anything seems confusing. Please let me know if you have any questions or problems with the pattern.
EDIT: There seemed to be some problems with the jpeg form of the pattern not printing the two pieces at the same size. I have uploaded pdfs and they seem fine.
Friday, October 15, 2010
Giveaway gentle nudge
Just a reminder to enter the giveaway for one of these amazing doll panels. The one in the photo is little red riding hood. Just leave a comment on the post. I think I will extend the deadline a few days. In my real life I am researching teeth so I find this a fitting image for today.
Labels:
doll panel,
free,
giveaway,
little red riding hood
Sunday, April 25, 2010
Earth Week . Last Chance for Giveaways!
Labels:
free,
free stuff,
giveaway
Thursday, November 20, 2008
Small gift

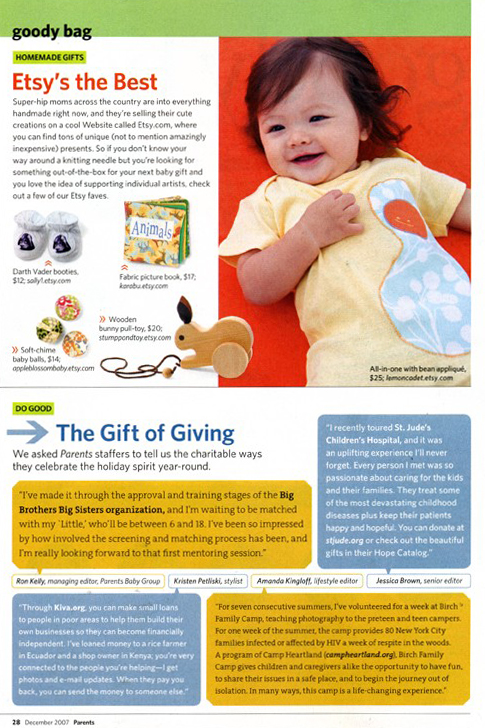
I'm an avid reader of Small magazine and have been since issue #1 was all over the blogosphere some time ago. If you remember, Lemon Cadet had some pieces featured in a spread in a later issue.
I offered one of my rompers for those who participated in their giveaway, Small Gift. Check it out.
Labels:
baby,
free,
gift,
handmade,
handmade onesies,
onesie,
small,
small magazine
Subscribe to:
Posts (Atom)