Showing posts with label craft. Show all posts

Sunday, February 06, 2011

Book Reviews


This post will contain links to all of the books I review on this blog.

Bias: All of these books I have bought (usually used on Amazon or with gift cards I have gotten for my birthday from Barnes and Noble) or they were given to me as gifts. So far, no one has been giving me free books to review. If something changes, I will let you know.

Thursday, November 25, 2010

Handmade Dollhouse Furniture on Etsy

After you try making your own miniatures and realize how hard it is, you can buy stuff that other people make. I seriously can't believe some of this stuff is handmade. I sifted through thousands of dollhouse stuff on Etsy and came up with a list of really amazing finds. There is no information on scale for some of these items. But, hey, the good thing about handmade stuff is that you can just ask the person who made it.

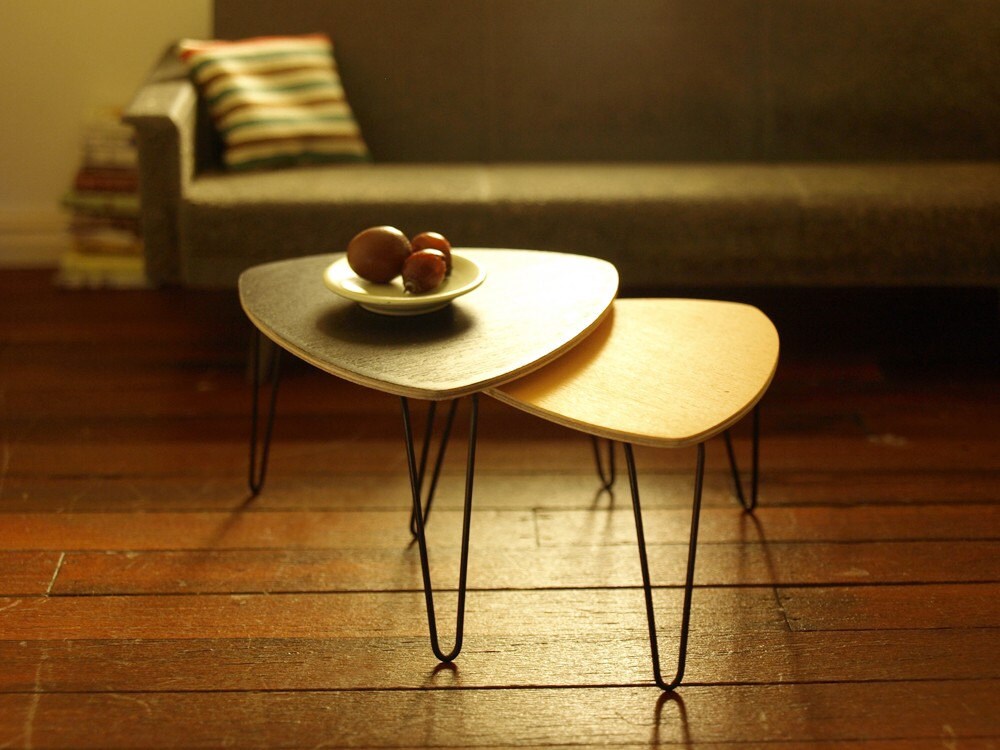
 These nesting/stacking tables had me at hello. Check out miniaturesbyannina. Oh, and this too.

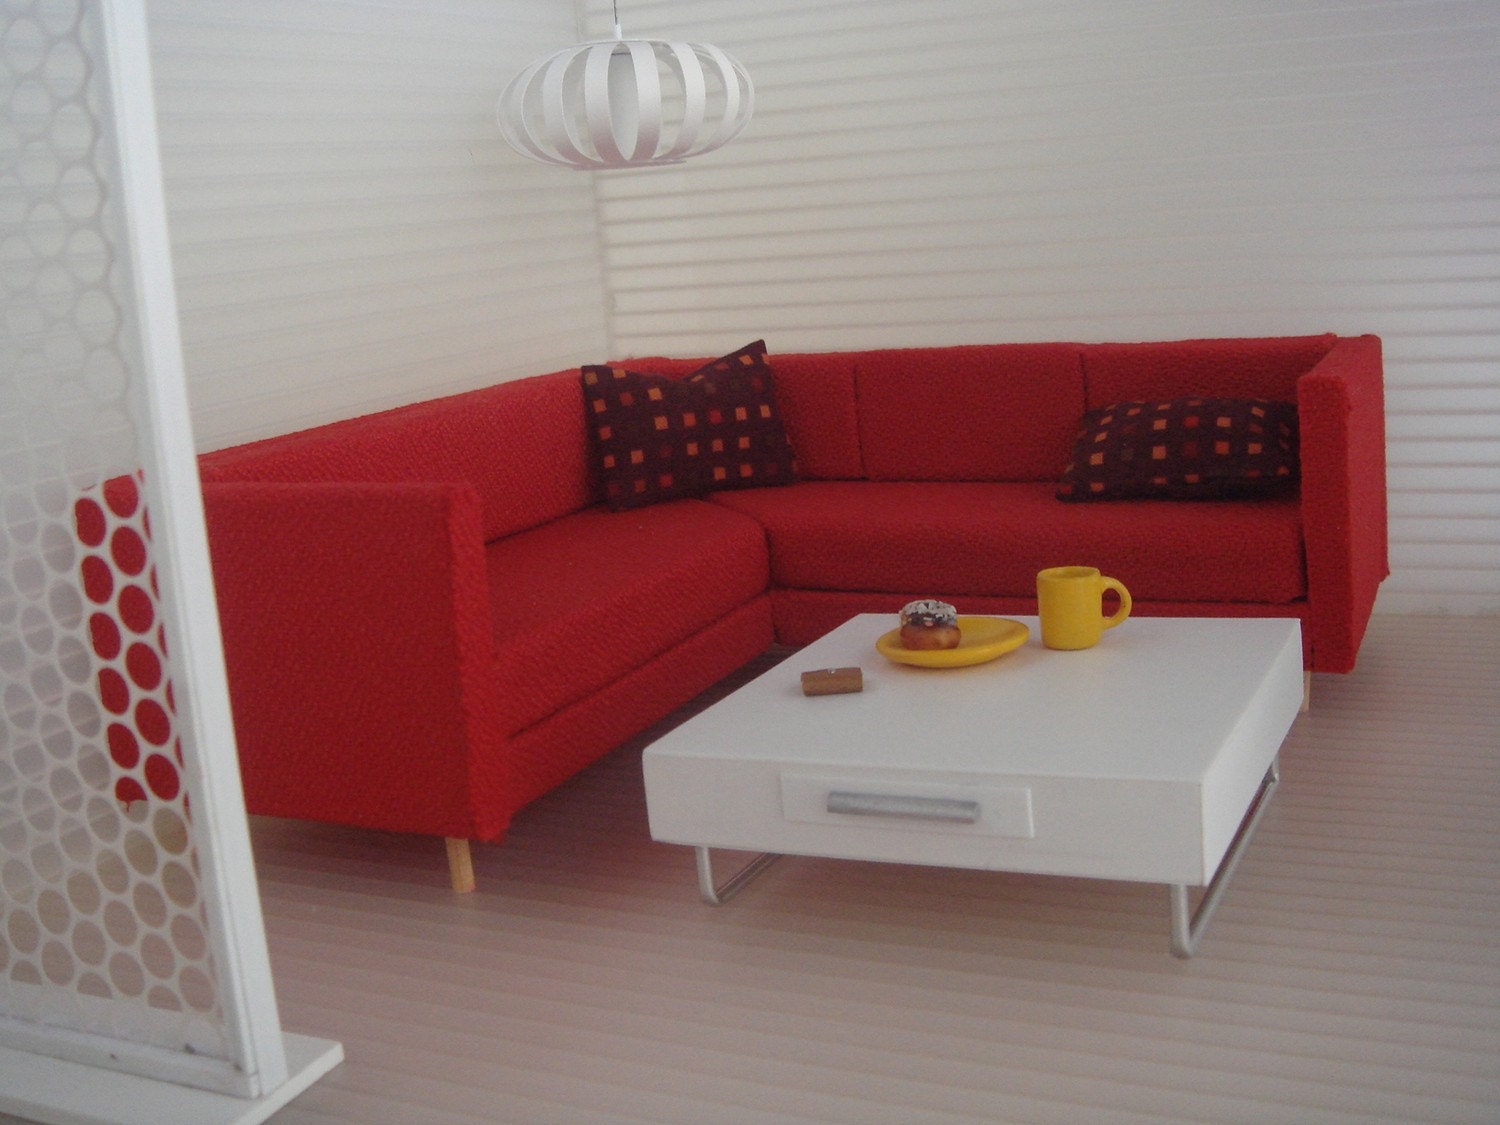
I had this couch in real life once. This one is cleaner. Red sectional by minimodernistas. Click over to the sold items for a real treat.

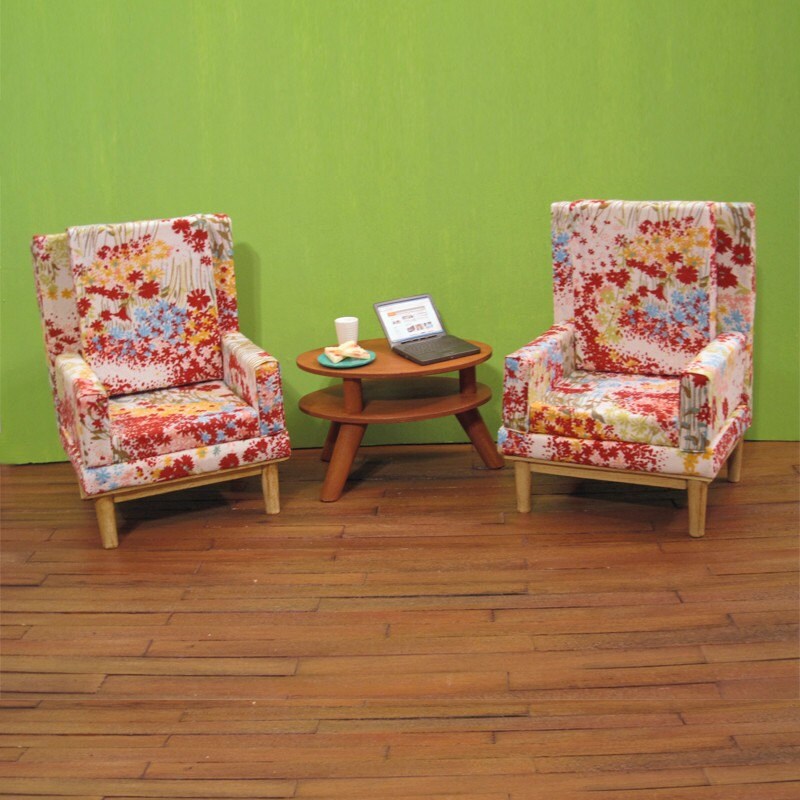
Isn't this yummy? I want to clutter it up with some tchotchkes. By AmazingMiniatures.

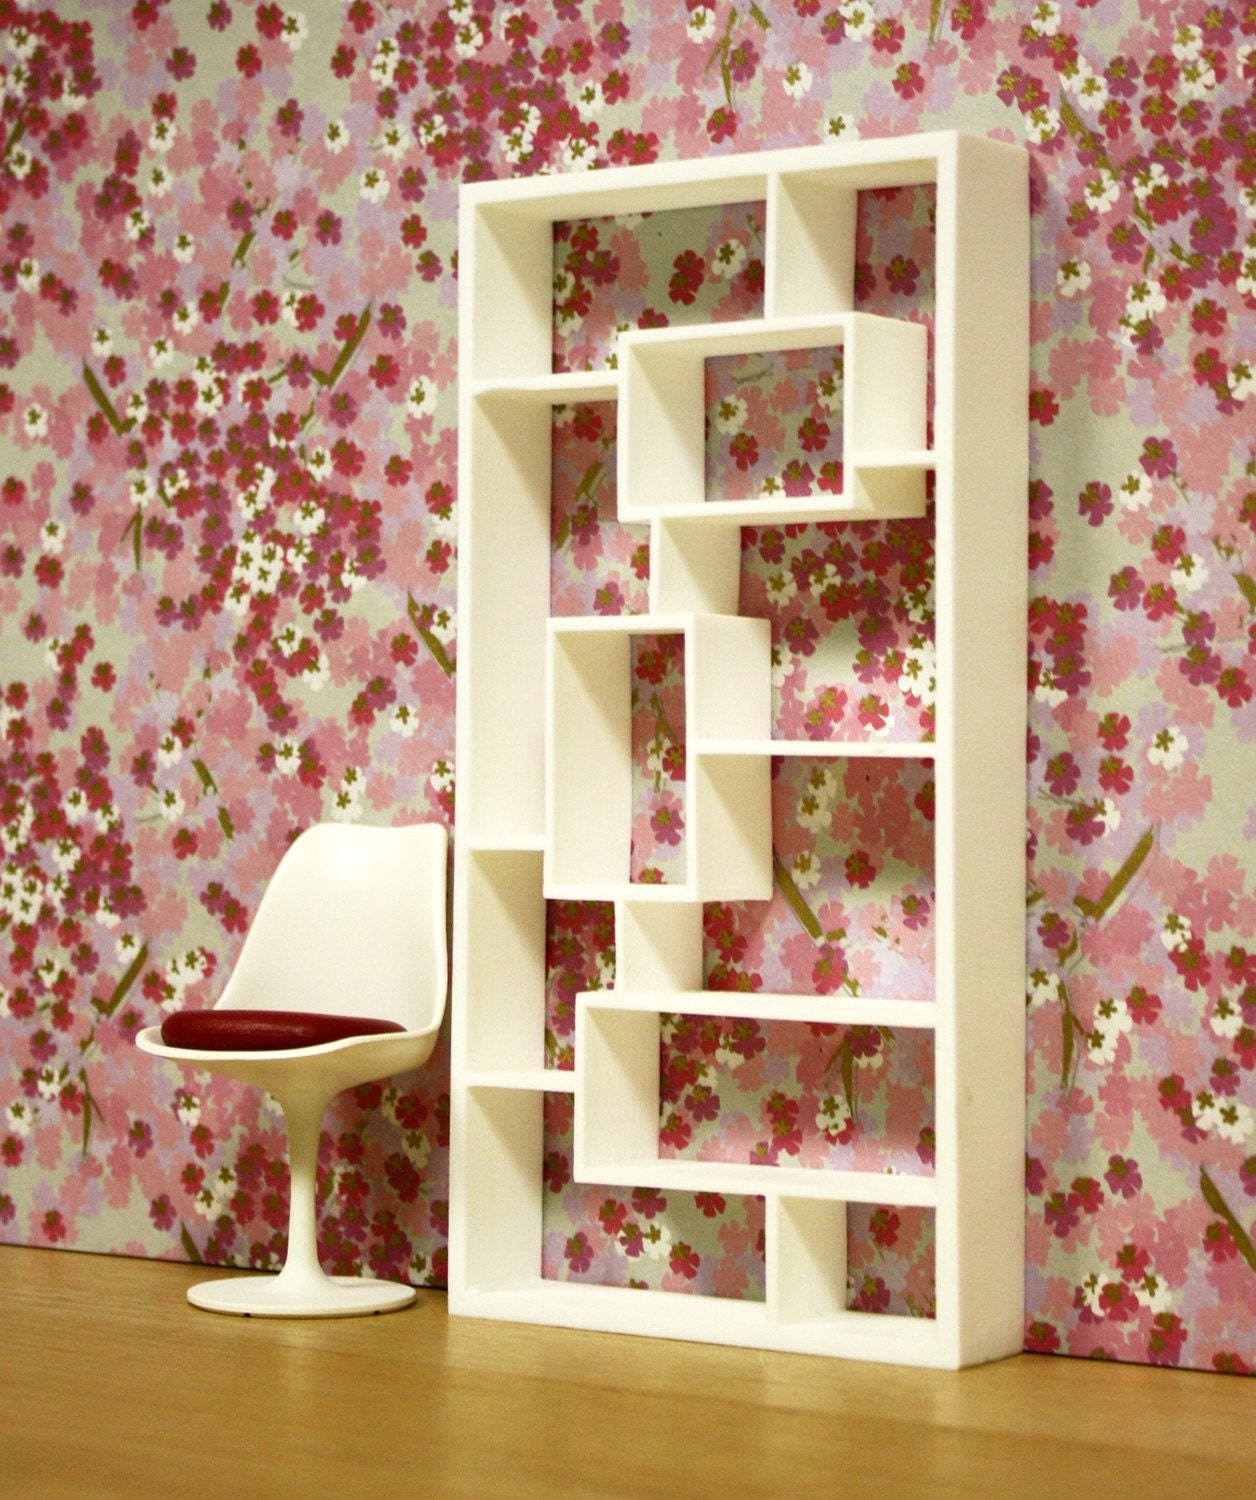
Look! It's the Expedit from Ikea. I love it. It's probably better quality though -- and you don't have to put it together yourself. She has the Lack side table as well (see the sold items). By Amatheria.

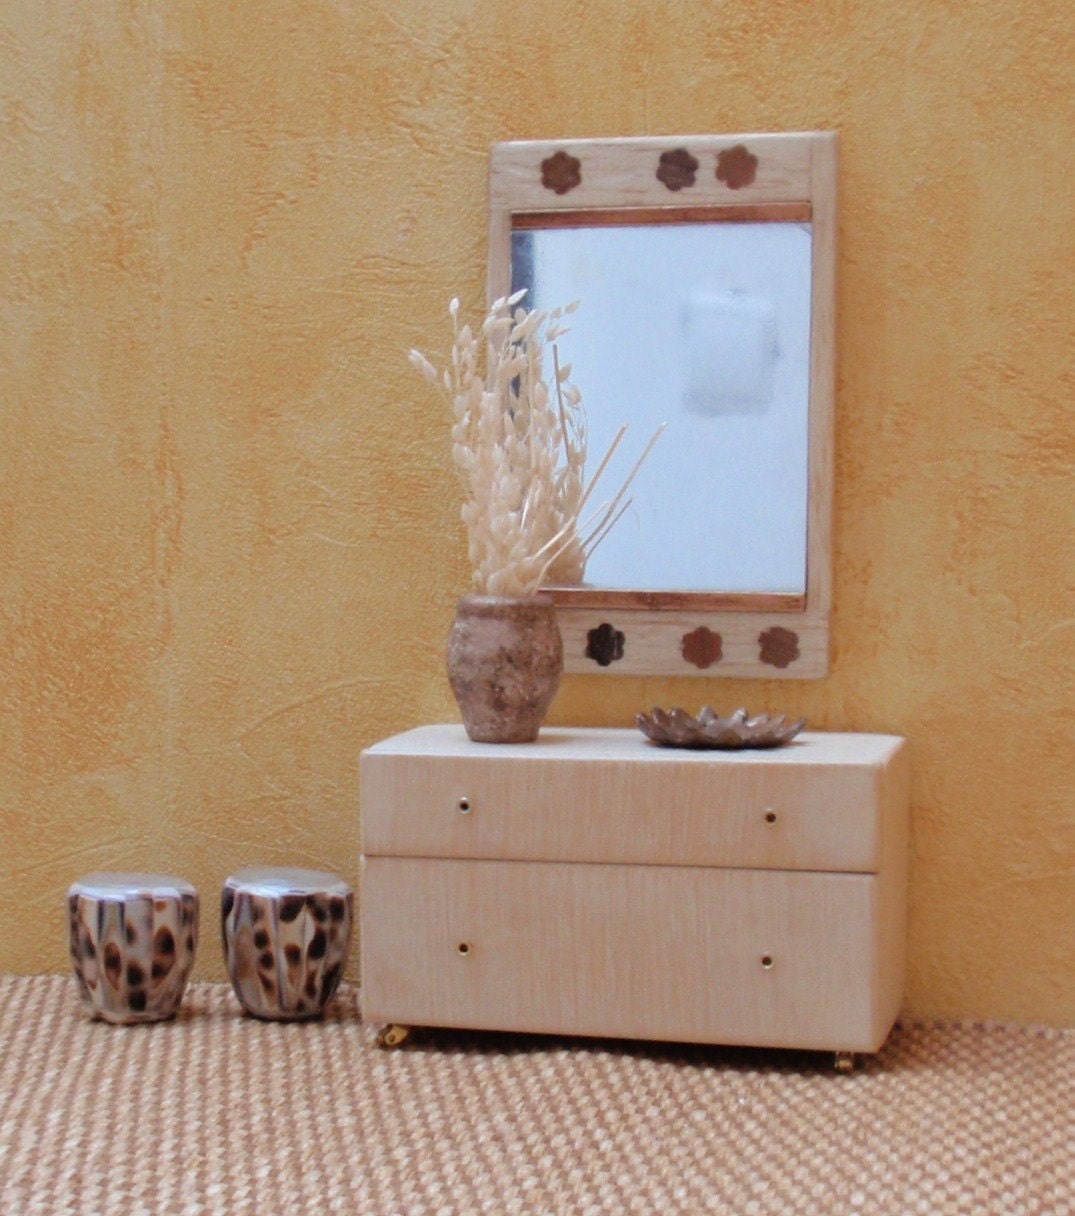
This is pretty cool. It's even on casters. By miniaturesforever. You know how we love our unfinished pine around here.

This whole shop is killing me with it's amazingness but I think I need one of these chairs. By smidgehouse. If I were a bachelor, I'd live in this apartment. It seems as if I have two girlfriends.

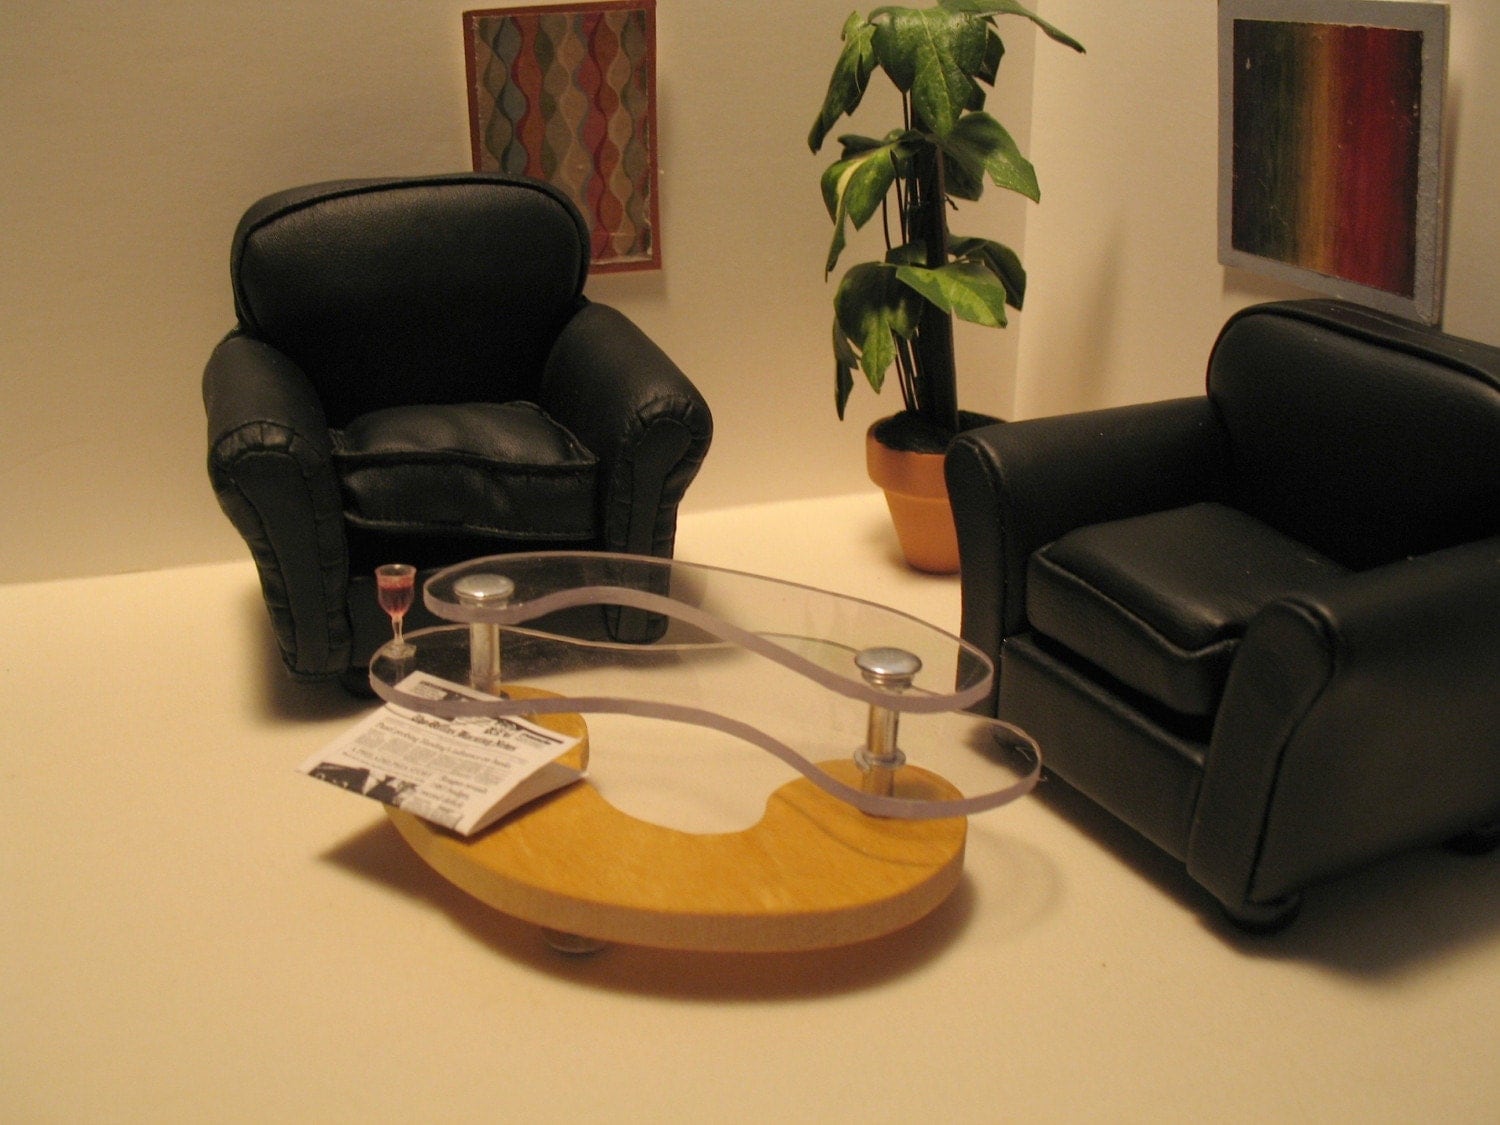
From High Point, NC, furniture capital of America: the Contour Coffee Table. By minibydesign. Another shop whose sold items are phenomenal.

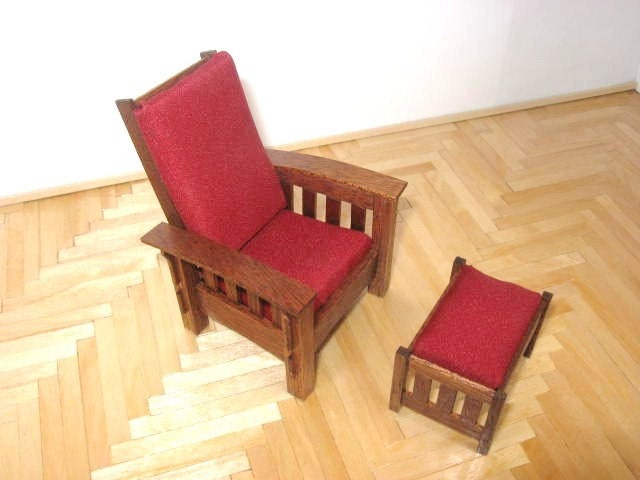
Who doesn't love them some Mission Oak? And check out that floor. I want that it my real house. By minibuilder.

You probably don't really want to let your toddler play with any of the above. These are for when your kid goes to bed and you pull out the high-end stuff. Check out the rest of the dollhouse posts here. Let me know if you want me to post about the play dollhouse furniture on Etsy. There are some nice pieces at reasonable prices.

Thursday, October 07, 2010

Interview with Constance Kaiser

I spend a lot of time on flickr. I love looking at the stuff that other people make and their inspiration. One day I somehow came across these super cute robot dolls and superheroes. After some clicking, I discovered that the artist, Constance Kaiser, uses Spoonflower to print panels so that people can make their own. It's a wonderful project for people who are new to sewing or who want to make something quick; you don't even need a sewing machine. I was so taken by these little guys that I asked Connie, of Connie Lou Fabrics, if she would do an interview so we could learn more about her process. She has some really amazing items. I love the Little Red Riding Hood tote panel that has everything to make a little bag and all the characters from the story. She also has some holiday designs (like the Gingerbread Man below and a matching hand puppet panel) that can work throughout the year.

Can you tell us a little bit about your background?

I’m a stay-at-home-grandmother, with a husband, two grown sons and an 8 year old grandson. Most of my work experience was in the public sector: Director of a Head Start program, Legislative Aide at the Virginia General Assembly, etc. I have no formal art training or graphic art experience. But I am one of those obsessive artists, who sees everything as a blank canvas needing some decoration.

My mother loved to sew and I was the artist, so we combined to become sort of a craft-conspiracy. She would sew darling dresses for my nieces, then I would hand paint or applique on them. Though I consider myself a non-sewer, I learned to love fabric from my mother. I also have a beautiful collection of antique quilts done by family members (one of which won a first prize at the Ohio State Fair in 1932).

I like that you offer a basic print to coordinate with your more whimsical images. That’s not something that I see a lot on Spoonflower. Why did you decide to do that?

So I had been doodling, painting and crafting for sometime when I tripped across Spoonflower last year. I thought the idea of short-run, original design fabrics would be an extraordinary tool for crafters and seamstresses. What fun it would be to make a clutch from an original design and line it with a coordinating print, make a unique fabric baby bib and back it with a matching plaid, or add coordinating original design fabrics to a quilt. The possibilities are endless! I rarely work on a print that in my imagination when I’m not designing the matching plaid or stripe or print.

Your doll panels are such a great idea. My mom made lots of dolls from these panels for me when I was a kid, even a tote bag that I still have. Is this a nod to vintage?

In my first shop on Etsy I made and sold original design dolls and puppets. So I began thinking that those would be perfect to print up on fabric and then sew. Better yet, I print them and sell the panels to people who sew to make up. I’ve really had fun with the concept of panels or kits. I think that the difference between “Look what I bought for the baby” and “Look what I MADE for the baby,” is incredible. I never thought of it being vintage, but in a way I guess it is. Like when my mother and I worked together. I’ll be the artist and you do the sewing and together we’ll make something unique and original.

I’ve never seen images printed on fleece before. What is that process like?

I believe that fleece is God’s gift to non-sewers. You don’t have to worry about hemming or finishing seams or fraying. And fleece can be cut into all kinds of shapes and patterns; plus fleece is sooo soft for baby and toddler toys. Though I work primarily through Spoonflower for my fabric printing, and I love the Spoonflower community and all the technical bells and whistles that Spoonflower has, I go to another site to have my fleece printed. Spoonflower made it clear early on that they would not be printing fleece; they would only print organic fabric. I go to Fabric on Demand to have my fleece printed and the process is very much the same. I’m amazed at how crisp and bright the colors are, though I do lose some of the fine detail (that’s just due to the fuzziness of fleece). I think that soon all my pocket dolls will be done in fleece. The smaller the object being sewn and turned, the less fabric you want wadded up inside the little nooks and crannies. And with fleece you can work with a much smaller seam allowance and not worry about fraying.

So, what's on the drawing board?

I just can’t stop thinking about all the wonderful possibilities of printing your own fabric. I’m already designing the Christmas presents for my family this year. I’m going to take some traditional family holiday recipes, write them out on recipe cards, then scan them and make a print out of them. I plan to print up the fabric and make tea towels or hot pads for all my brothers and sisters, cousins, and nieces and nephews. How adorable will that be…“Aunt Jean’s Pumpkin Pie” and “Aunt Dorothy’s Creamed Onions” and “Grandpa’s Christmas Fudge”! I’ll also be adding some baby shower gifts panels and children’s apron kits to my shop as soon as the printed fabric arrives.

Thanks so much to Connie for the interview! Come back tomorrow because Connie has offered to give away one of her panels to a reader. Make sure you check out her other shop, Mini Monster, where she sells her finished creations like hand puppets and cool little monsters.

Wednesday, June 16, 2010

Project: NYC Pants

My mom and I have developed a little tradition of taking a mother/daughter trip to New York every couple of years. This past Fall, we took Zadie with us. It went surprisingly well even though I was super stressed about getting food in her and freaking out when she wouldn't nap. I've definitely chilled out a lot since then (I think).

I picked up an XXL men's shirt with this pants pattern in mind and actually got around to making them. I took these photos back when it was cold out. Now it's 80 - 90 degrees every day. We wear these to the park a lot because the cotton is thin and it's easier to go down the slide in pants than shorts.

They are surprisingly easy to make, a great fit over cloth diapers, and just plain awesome. I have two pairs of these that the designer, Kim, has made. We met at a craft show a couple of years ago and kept in touch. She is an amazing person. Everything she makes is from recycled/upcycled clothes and she uses pretty much every piece of those shirts. It's very cool.

These are Zadie's favorite pants. Check out the little detail I added to the hem. Just imagine what I can do with my new sewing machine (did I just write that? ha! more on that later. I'm still too afraid to turn it on).

Thursday, May 13, 2010

Project: Yellow Elephant Pants (kids clothes week day 4)

This morning I had the finished elephant pants out on the chair for Zadie to wear. As soon as she saw them she started demanding, "I want my effin pants! I want my effin pants!" It was pretty hilarious (to me). I used the Sailor Pants pattern from Dans La Lune on Etsy. I didn't have any problems printing out the pattern or putting it together. It was very straightforward. In fact, all of the directions were easy to understand and follow. The pictures showed what they needed to show. Well done.

It took me forever to get started on them because I was overwhelmed by all the buttonholes. But after having learned how to make them on my machine I'm all about them now. It's really not that bad. The only thing that I had problems with is the opening at the back for the buttonhole elastic. There was a marking on the pattern so I used that (it is probably a grain line). I didn't look at the photograph. So it's in the wrong place and there is a weird gap and I'm really not sure how I'm going to fix it. I could cut another hole or move the buttons.

Either way, the pants are adorable and a great fit. I didn't have enough fabric to make them as long as the pattern but they are perfect. When she gets taller, they'll be even cuter as capris. Lovely.

Today I spent my hour doing cross stitch. In my inspiration hunting late last night, I found some cute pocket ideas in Bend the Rules Sewing for aprons. I got started on the crocodile and will make a pocket out of that. It was nice to just do something mindless for a while.

Thursday, March 04, 2010

Project: Loot.

Although there is a quilt shop and a weird upholstery fabric store in town, we don't have a true sewing shop with different types of fabrics and notions and patterns and all that deliciousness we love and hoard. So when I go to the sewing store, I stock up because it's a 45-minute drive. Last weekend I went to visit my parents so that my mom could watch the kid and I could have as much uninterrupted time with my list as I needed. Success. I bought these fabrics for projects for me. The teal faux silky stuff is for this top (see note) that I wrote about before. I should be able to wear it to work if it ever warms up. The cotton dots print is for this dress. I'm going to make the Maya version because I want something cool and lovely for Summer. I had to buy zippers too. I have never sewn a zipper before. Ever. Someone has always done it for me.

This dotted swiss is for this dress (see note) for Zadie. I thought I would make it very much like the pattern and add trim in two different colors. I love dotted swiss. I would use it for every project if it made sense. I just love the vintage feel to it.

Finally, this is the haul for the second Oliver + S pattern that I'm going to attempt, the Playdate dress. I didn't mean to buy fabric so like the example on the package but after seeing the nursery rhyme toile, I had to go for it. And chartreuse with deep blue and red is so underrated. I think it will add a perfect punch.

I love shopping for supplies. So much of making good projects is in finding the right materials, making a good list and checking it more than twice, and living with the patterns and fabric until it feels right.

Friday, February 19, 2010

Project: a feature!


The amazing folks over at Feeling Stitchy featured my Yeti Dreams of Soup dress on their blog. It's a great site full of all the latest stuff in the world of embroidery: new patterns, some projects, free tutorials, and a lot of talent.

It's an honor to be there. Thanks so much!

Tuesday, February 16, 2010

Project: Men's Dress Shirt Dress

Since Spring isn't listening and we just keep getting more snow, I've decided to stop fighting it and just go with this Wintery theme: Corduroy! ManiMina on Etsy has some really great patterns. A few months ago I bought a set of patterns for recycling men's dress shirts into cute toddler wear. One pattern makes this awesome dress, another makes a top and skirt, and the third has you turn the arms of the shirt into a pair of pants.

I bought a super thick brown corduroy shirt at the Salvation Army for a buck. I thought it would be great for winter. When I took these photos the dress fit perfectly. Then two weeks and a growth spurt later, it was a tunic. I don't know how Mr. Lemon and I turned out this tall kid. I'm 5'2" and Mr. Lemon is no basketball player.

I decided to add some length to the sleeves since this would be worn when it's cold (and now with leggings, also super cute). That was not successful at first; the armholes, which fit perfectly with short sleeves, were way too tight when lengthened. I cut an ovalish shape out of some of the scraps and sewed them into the armpit area after ripping apart that seam. Now it's perfect. I will have to watch out for that when lengthening other patterns. It's no fun to hem sleeves so I added some cute bias trim that I bought on Etsy (it's Michael Miller) before I knew you could make your own.

The dress seemed dark to me so I went nuts with my sewing machine's very limited selection of decorative stitches and added a bunch of detail. I just put some pins in to give me some direction. That was quick, fun and really easy so I'm definitely going to keep doing that little trick.

Finally, I dug through my stash of vintage buttons and found some interesting ones to use in place of the hideous ones that came on the shirt (I bought a tin full of buttons at a yard sale for $3 a few years ago -- what a find!). The only really challenging part about making this dress, for me, was the thickness of the fabric -- especially where there were existing details in the shirt. It was a lot of bulk for my machine but the Huskystar once again pulled through.

I loved making this. I had made the same pattern with short sleeves for a friend in the Fall and will definitely use this pattern again. There are some other tutorials floating out there online for similar projects out of men's dress shirts so I'm going to try them all and report back to you.

Monday, February 15, 2010

Project: Design Challenge finished! Yeti dreams of soup.

If you were a yeti, what would dream about? Soup!

I'm so happy with the way this dress for the Design Challenge turned out. And Zadie loves it to. When I finished it I held it over my legs so it would be at her eye level and she screamed, "Yeti dress!!!!" and gave it (and me) a huge hug. Success.

For my embellishments, I did a reverse applique using one of my yeti t-shirts. I'm happy with the way it turned out and it was totally worth the challenge. If you like doing this technique, try it with a design element. Just trace your image onto thin paper (or photocopy it) to use as a template for placing the fabric underneath your garment. Use a lot of pins to get it right. I stitched around the edges before I cut then went around it again after. Basically I felt that the machine stitching wasn't standing out next to the embroidery so I wanted it to pop a bit more. It wasn't necessary to the construction because I used Wonder Under around the edges of the yeti.

I did the embroidery starting with the bowl of soup. I mapped out where I wanted everything with pins and then just did it freehand. I wanted it to look dreamy so I didn't want to draw on the dress and "trace" with the needle and thread. Finally, I surrounded it with the thought bubble.

Doing this project really reminded me of my love for embroidery. I'll be doing more of this type of work to Zadie's future outfits. If anyone wants a tutorial on my reverse applique, leave a comment. If there is enough demand, I'll write one up.

For more on Project: Project, read this post.

Wednesday, February 03, 2010

Project: Kimono

Always a sucker for a free pattern, I downloaded this amazing kimono tutorial from the Habitual blog. As soon as I saw this Lizzy House fabric in the Red Letter Day collection, I knew they would be perfect. And what's better, I think I made this whole thing from fat quarters (not sure about the back).


I knew it would be worn in the winter so I added some length to the sleeves. Instead of ties, I used a hidden snap closure for the outer layer and a button with an elastic loop for the inside. This was the project that got me addicted to bias tape. I hadn't even known before this that there was such a thing as a bias tape maker -- and now I'm considering buying some different sizes. Ironing is so good for my space cadet tendencies.

This one piece has gotten a LOT of wear (only a recent growth spurt made the sleeves too short but perfect for Spring). It's roomy enough for layering and super easy to put on. Just beware that your toddler will learn how the unsnap before the resnap.


For more on Project: Project, read this post.

Monday, February 01, 2010

Project: Buttons or Snaps?

This weekend I was able to all but finish the Oliver + S playsuit I was working on. It's adorable. We put it on the poor kid even though our house was a bit chilly. Now when she sees it she says, "Cold." Yet another parent-of-the-year award...

It will be warm enough for her to wear this about the same time she turns 2. So what do you think: buttons or snaps? She is getting good and snapping and unsnapping but not so good with buttons yet. I like setting snaps (er, having my husband set them) and I've never made a buttonhole. Hmmmm....
For more on Project:Project, read this post.

Tuesday, January 19, 2010

Project: Decisions (or, So Much Fabric So Little Time)


I bought some Oliver + S patterns a few weeks ago and realized that I was hoarding them like my cutest cuts of Japanese fabric. Yesterday I decided to break out the Playsuit pattern and go for it. It's sold as part of the Tea Party Sundress set.

Although the samples feature a solid fabric or a solid paired with a print, I really like mixing prints so I got out some of my favorites and starting messing around. How surprising that this Lizzy House Red Letter Day fabric (Pearl Bracelet and Stripes) goes so well with the Michelle Engel Bencsko Shade Garden line (Snail Trail and Sprouts).


So which one do you like the best?

(Playsuit image from the Oliver + S website.)


For more information about Project: Project, read this post.

Monday, January 18, 2010

Project: Storybook Cape

I'm a huge fan of the Grosgrain blog. Kathleen is an amazingly talented seamstress, designer, and photographer. I don't know how she does it. All I know is that I'm lucky enough to have a kid just a few months younger than hers so if she keeps posting patterns like this one that fit her kid, then I'm all set with cuteness.

This cape was incredibly easy to make. I'd like to say it took longer to cut out the slippery velour than it did to make the entire cape but I screwed up (what, again, really? no.). Something that should have been simple, of course, took me a couple extra hours.

So I chose this incredibly soft dark chocolate brown velour to pair with the super bright turquoise fine wale corduroy. Kathleen said not to choose stiff fabrics so I was worried about the corduroy but it was perfect to give some needed weight to that crazy velour.

Zadie came with me to the fabric store to pick everything out and she was dying over the velour. When we got home she was draping the yardage over herself like a kimono and would pile herself dramatically on top of it on the floor all while shouting, "Soft! Soft!" So I hurried to cut out my pattern pieces and stitched her up a little soft of her own with what was left over. "The soft" has now joined the entourage in the crib (Mila, blankie, Elph the elephant).

What I did wrong: Because I used such a slippery fabric, the two layers weren't holding together very well. So I decided to tack them together at the top and bottom of the sleeve holes with a horizontal stitch. I did this before sewing the bottom hem so I couldn't turn it inside out to make a blind hem, I had to pin it together and topstitch the entire thing. With velour, you need to pin every inch or it goes wild. I like to pin and I love to topstitch (as I've said before). But ugh. Then I had to rip out a few sections where it got all bunchy bunchy and re-stitch.

The end result is amazing. Zadie loves it and we can't wait for Spring when this becomes a permanent fixture in the outerwear collection. Check out Grosgrain for all the giveaways and help out her friend win the wedding of her dreams.
For more information about Project: Project, read this post.

Friday, January 15, 2010

Project: Mod Sampler Quilt

all my rows stacked and pinned

A few months ago I started the quilt-along hosted by Elizabeth of Oh, Fransson! I had discovered the quilt-along because I saw Elizabeth’s quilt patterns for sale on Etsy. Her work was so inspiring that I bought one or two of her patterns and all the fabric to make a quilt for Zadie’s toddler bed (even then I knew it would take me forever to do it so I was thinking way ahead – no crib quilts here, I know me). I followed the links to her blog the day she started the quilt-along – what great timing.

I had only made one other quilt before, the patchwork crib quilt from Amy Butler’s In Stitches. Although that was technically a quilt, I didn’t really feel like I had made a quilt. There was something just not quite patchworky about it. I thought the quilt-along would be better as a beginning project than just jumping in with my precious Heather Ross fabrics that I had bought for the toddler bed quilt project.

I was very excited to get started. As I moved quickly through the first few steps and was able to keep up with the instructional posts, I photographed my fabrics, my stacks of pieces ready to go, and the different blocks along the way. I even posted everything to flickr and put them in the pool. I got all of my blocks pieced together and then I stopped. Cold.

I piled everything up on top of a storage box in the office and left it there. I’ve been looking at it become a fixture for all these months. Then all of a sudden, Elizabeth started posting on her blog more frequently. Then she started another quilt-along. Instead of going absolutely insane and joining in, I decided to finish my Mod Sampler. I got everything out and pinned together my rows. Wednesday night I sewed two of them together and last night I did two more. There are two more left and I’m loving it.

But as I’m learning more about the process, I realize that even though I’m still a beginner at this, I can do things my way. I do not like sewing on the freezer paper so I’m taking it all off and won’t ever use it again (quilters use freezer paper to help add on some width to a cut that is too short). I also don’t like my quarter inch foot so it’s coming off and I’m going to make do with my regular one.

I never thought I would learn so much by simply picking up an old project where I left off. I feel like a better stitcher and am more confident in the decisions that I make with my craft. I’ll post again with pictures when the top is finished. I’ll definitely need some help picking a fabric for the binding.

For more information about Project: Project, read this post.

Thursday, January 14, 2010

Project: Someone Else's Project, THE 2010 HANDMADE OLYMPICS!

The rikrack studio is hosting the 2010 Handmade Olympics. I've been a follower of their Twitter feed for some time now and just learned of this awesome event.

So here's the deal: you can nominate yourself and others in 8 different handmade events from eco-friendly goodies to a handmaking-focus blog. I just submitted my first nomination and then posted that to Twitter (I can't bring myself to type the word tweet as a verb in that usage just yet except in parentheses like this. The same thing goes for Google as a verb, journal as a verb, and blog as a verb. I'm sure I'll get over this one day but my years as a lit. major are still winning my inner battle with technology.).

Anyway, check out this post for all the details. I might even nominate myself.

For more information about Project: Project, read this post.

Sunday, January 10, 2010

Introducing Project: Project

So lately I have been figuring out some things. Lemon Cadet is going to see some change.

The background: Little by little, after almost 6 years here, our tiny house has started coming together. I asked myself how it was happening and it took me a while to remember that a couple of months ago, Mr. Lemon and I agreed to keep the kitchen table clean. What was once a huge pile of mail and newspaper inserts and hats and gloves and my bag and cookbooks and magazines is now a clean yellow surface. That clean spot spread to the hutch against the wall, then the side table next to the couch in the living room and then the mantle above the fireplace. What used to be this huge pile of dread that sat there sucking my life away into its vacuum of procrastination, is now where we eat dinner. And cool cookies (since we have no counter space). And decide what coffee cake recipe to make. And pin quilt pieces together.

Now I'm not saying that I'm some organization queen. In fact, that photo above depicts about 15 seconds in the life of that countertop. There's a lot going on in that space right now. And we have some messy closets and one earthquake aftermath of a basement.

But it seems I've been able to start cleaning up this mess. I have just been doing it a little at a time. And I feel a lot more free. I've been doing projects like a maniac. We have been decorating -- making the transition from living like messy college students to like adults or something. I've been sewing lots of great things and designing and taking pictures of it all.

I'm giving it a year. Project: Project is going to chronicle the new action. Look for more frequent posts (I promise they will not be this long) and tutorials, interviews and the results of my OCD research. As always, I'll continue to post about all the craftiness that I'm up to with a little bit more information on the process (pattern review), the results (what I had to change to make it work), and the accidents (happy or not). I'm really excited about this and am looking forward to it. My goal is that others will be motivated to start on some projects of their own.

Tomorrow: A bit about me.

Soon after: Some projects.

Stay tuned.

Tuesday, July 21, 2009

New Projects

I've been on a crazy crafty roll lately making lots of things for Zadie. We're going on a little trip soon and I wanted to have some really fantastic toys to take with us. My favorite is this 21" cat doll. I bought the pattern from mmmcrafts on Etsy. It was a pdf and Larissa emailed it right away. It was an incredibly easy pattern to follow and I really enjoyed making it. I've been sewing a lot of stuff lately and with some patterns, I spend more time reading and re-reading the instructions to figure out what the heck they're telling me to do. That was not the case here. It was well written and the drawings were perfect.

The best part was picking out the fabrics. I couldn't decide between this teal corduroy and some red that I also had. I put them both on the couch and let Zadie decide. She pretty much charged at the fabric from across the room (this is a toddler who isn't quite toddling yet so it was funny to see) and jammed her little pointer finger onto the teal. She made her choice very clear. I didn't even realize that she could understand what I was asking.

I don't think I altered the pattern in any way (although I did embroider the face instead of using felt). The sleeves are cool ladybugs I picked up on Etsy for the Mod Sampler Quilt-Along project that I haven't finished yet (all the blocks are done, I swear!). The funny thing is that the sample cat in the pattern is wearing the same sleeves in a different color. I thought they were polka dots until I saw a closer picture on her flickr. The skirt was a challenge since I had never sewn elastic in like that but it was cool to learn something new -- and it was pretty easy. I used a Japanese house print that I got at Purl in Soho, some Echino, a solid -- really all just stuff I had. I didn't have to buy anything new (although I did and didn't even end up using it, as usual).

The shoes were my favorite: